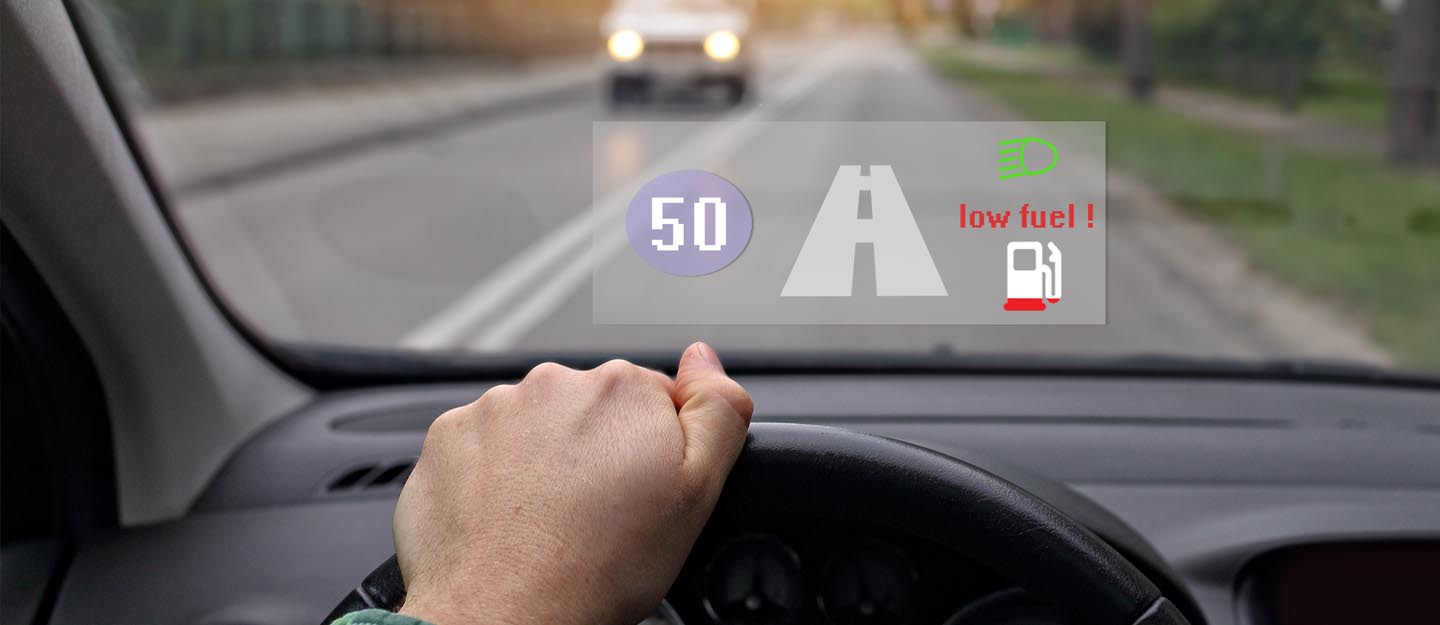
A heads-up display (HUD) in a vehicle presents vital information such as speed limit, navigation, audio setting and lane departure warning directly onto the windshield. This minimises the need to divert your gaze from the road. With essential data within your line of sight, you remain attentive to traffic conditions and important alerts. Installing a HUD in cars is straightforward. Let’s guide you through some uncomplicated steps to install a heads-up display in the car.
How Does a Heads-Up Display Work
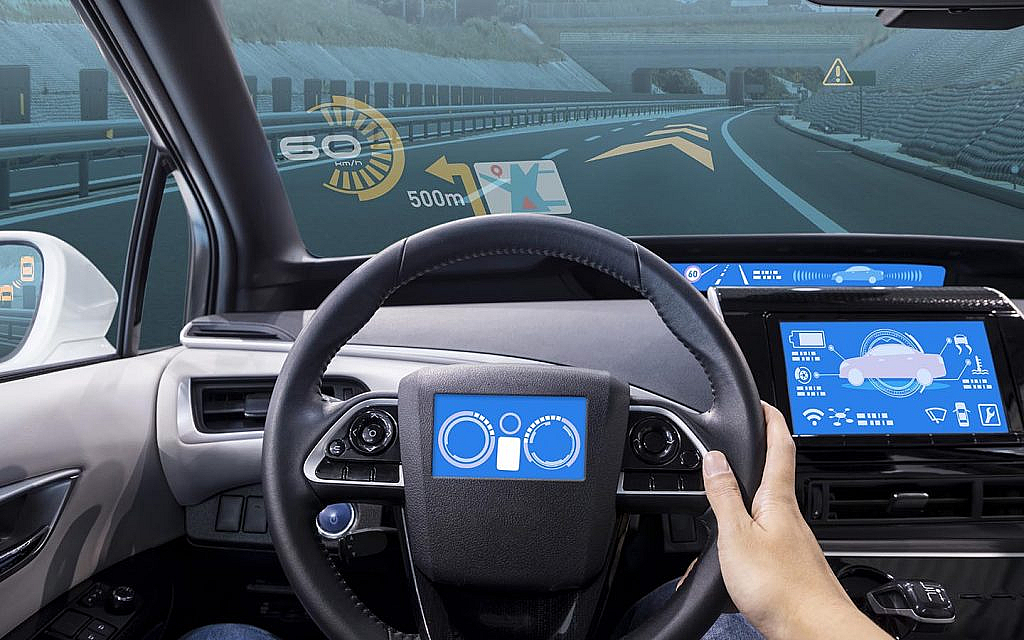
The HUD essentially projects information onto your windshield. It typically includes image-generating, optical and image-receiving components, along with your windshield. The imaging components create an image, video, or animation, which is then projected onto the windshield through the optical component.
It’s important to note that various technologies are at play here. These displays are used in aircraft and modern car models. They operate as standalone units or in conjunction with other systems, such as smartphones.
HUDs have been around since the 1940s, initially appearing in aircraft as ‘reflex visors.’ Over time, they’ve undergone continuous development and have become integral to modern aviation technology.
While there may be differences depending on the specific technology of the HUD, the fundamental working principle remains the same across the board. Here’s a basic breakdown of how it works:
Data Collection: The HUD system gathers information from various sources within the vehicle, such as the speedometer, navigation system and other sensors.
Processing: The collected data undergoes processing by the HUD unit. This could be a standalone device or integrated into the vehicle’s onboard computer system.
Projection: The processed information is then projected onto a transparent panel mounted on the dashboard or directly onto the windshield. This projection creates a virtual display that appears in front of the driver, typically at eye level or slightly below.
Optics: Specially designed optics used by the HUD system ensure the projected image remains visible under different lighting conditions, such as bright sunlight or darkness. Some HUDs use a combiner or reflector to overlay the image onto the windshield. Others employ a small projector to directly project the image onto the glass.

Customisation: Drivers can usually personalise the HUD display according to their preferences. They can adjust factors like brightness, colour, size and the type of information displayed to suit their needs.
How to Install Heads-Up Display in Cars
Follow these steps to install heads-up display in cars:
Step 1: Selecting the Right Heads-Up Display for Your Car
Before diving into the packaging, take a moment to select the ideal heads-up display (HUD) for your car. Consider the following factors:
Car Make and Model: Opt for a HUD model specifically tailored to your car’s make and model. Heads-up display are high-end car infotainment systems. Some HUDs are universal, while others are custom-made for vehicles. This ensures a seamless fit and optimal functionality.
Size and Placement: Evaluate the HUD’s screen size and how it integrates with your car’s dashboard. It shouldn’t obstruct your road view or vital dashboard information.
Features: Look for important features including speed limit warning display, navigation assistance (Google Maps), fuel consumption data and incoming call notifications.
User-Friendly Interface: Choose a HUD with an intuitive interface for easy access to critical information while driving.
Step 2: Preparing the Windshield

Thoroughly clean the area where you’ll mount the HUD display, ensuring it’s free from frost. Then, use the cleaning cloth to remove any dirt, dust, or residue. A clean surface is essential for proper adhesion. Here is how to clean the car dashboard effectively.
Step 3: Installing the Heads-Up Display
When mounting the heads-up display on the windshield go through the user manual carefully. Usually, head-up displays for cars come with adhesive tape for mounting.
Ensure a secure attachment for stability during driving. Connect the HUD to the car’s power source via a cigarette lighter socket, USB port, or direct wiring to the vehicle’s electrical system.
Proper connection powers up the HUD, projecting essential information onto the windshield for easy visibility while driving.
Step 4: Adjusting the Display
After installation, adjust the HUD’s position for optimal visibility. The display should be clear without hindering the road’s view. Fine-tune the angle and height to your preference. This may require some trial and error but is ultimately rewarding.
Step 5: Testing the Heads-Up Display
Switch on the car and HUD in a well-lit environment to test its functionality under various ambient light conditions. Ensure the projected information, such as speed and navigation, remains clear and legible. Adjust settings as necessary. Take a brief test drive to confirm that the HUD remains securely in place and provides helpful displays while driving.
Please note that in winter, a foggy windshield can affect HUD visibility. Ensure proper defogging before relying on the HUD for clear displays.
Benefits of Heads-Up Display on Cars
Evolution of car screens made way for big car screen with important features. These features usually add more value when it comes to vehicle safety and ease of driving. HUD is also a type of advanced screen displaying information on the windshield. Common benefits of HUD are as follows.
Convenience
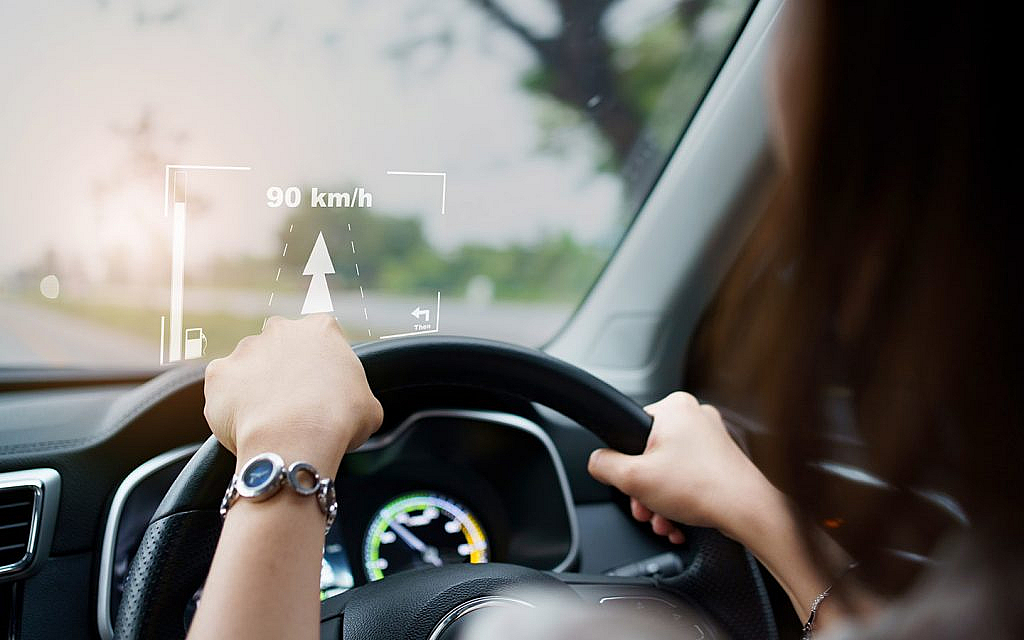
HUDs offer convenient access to essential information such as directions and fuel levels directly within your line of sight. This eliminates the need to divert attention to other dashboard screens.
Enhanced Driving Experience
Real-time data like fuel efficiency and vehicle speed displayed in front of you allow for adjustments in driving habits to save fuel and optimise performance.
Driver Assistance Features
Advanced HUDs may incorporate driver assistance features such as lane departure warnings and collision alerts when changing lanes incorrectly. This offers an additional layer of safety during driving.
Customisation Options
Certain HUDs provide the flexibility to personalise settings, enabling you to choose which information to display based on your preferences and requirements.
Integration of Modern Technology
HUDs add a touch of sophistication and modernity tech to your car’s interior, elevating its overall aesthetic appeal and safety.
FAQs
What is a heads-up display (HUD), and how does it benefit drivers?
A Heads-Up Display (HUD) projects vital information onto the car windshield, enabling drivers to focus on the road without diverting their attention.
Is it possible to install a heads-up display in any car?
Yes, a heads-up display in cars can be installed easily.
What is the process for heads-up display in car installation?
To install a heads-up display in cars, select the right HUD first according to your car’s make, then prepare the windshield. Clean the place where the HUD has to be placed thoroughly for proper adhesion. Next, install the heads-up display following the user manual. Adjust the display for optimal visibility and finally test the HUD in a well-lit environment.
How do I choose the right heads-up display for my car?
Consider important factors including car make and model, the size of the HUD and its placement on the dashboard, different features and user-friendly interface.
What information can I expect to see on the heads-up display?
Vital information that is displayed on the HUD typically includes the speed limit, navigation, lane departure warning and audio settings.
That is all about installing a heads-up display in cars and how it works. Besides, if you are still on a lookout for cars, here is a list of used cars for sale in the UAE.
For more on various important car components, stay tuned to UAE’s top auto blog.
Related Posts